

Direct Validate
The Direct Validate feature automatically validates records that enter your Org through API insert, Web-to-Lead, or bulk upload. Use Direct Validate to validate your data immediately at the point of entry.
Prerequisites
For each field that you want to validate directly upon insert:
- You have configured a validation in Verify Setup > Object Configuration. You can use existing validations.
Read more: - You have set up at least one Auto Process scenario for its field type (Address, Email or Phone). You can use existing scenarios.
Find and configure these scenarios via the Auto Process menu at left.
Configuring Direct Validate
To set up Direct Validate:
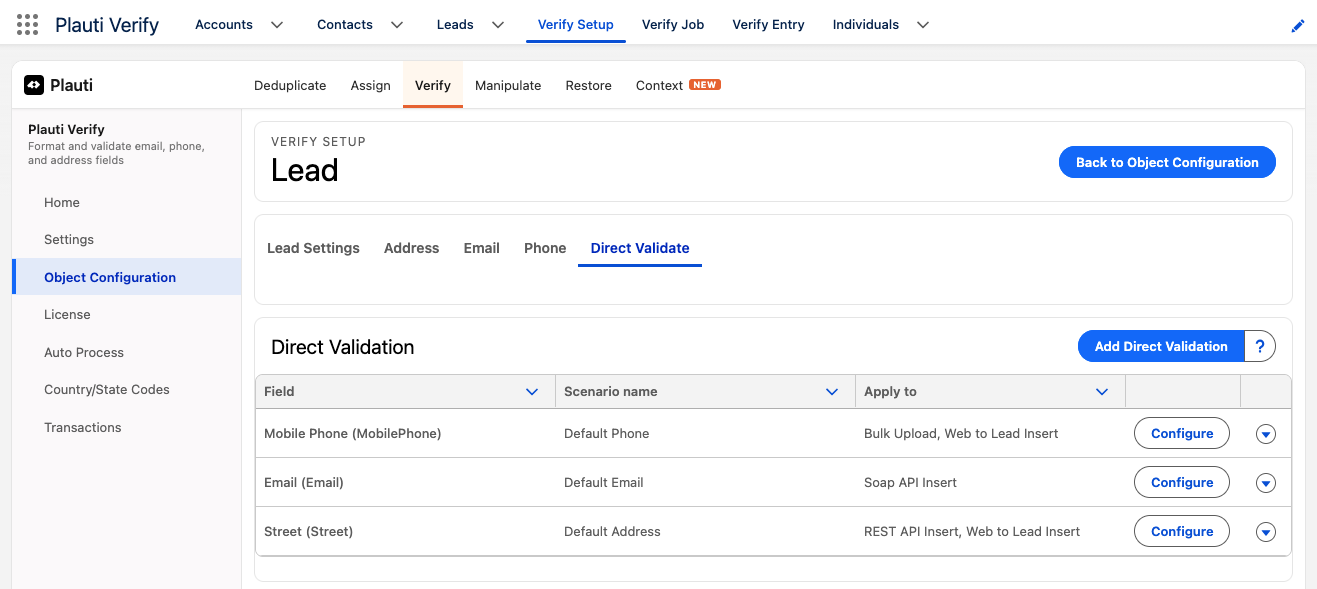
- In Plauti Verify, go to Verify Setup > Object Configuration.
- At the Object you want to configure Direct Validate for, click Configure.
- Go to the Object's Direct Validate tab.
Direct Validations are configured per field. For each field that you want to validate directly upon insert, create a Direct Validation that indicates which Auto Process scenario should be used for automatic validation, and to which types of entry it should be applied.
Adding a new Direct Validation
Click Add Direct Validation to add a new Direct Validation.
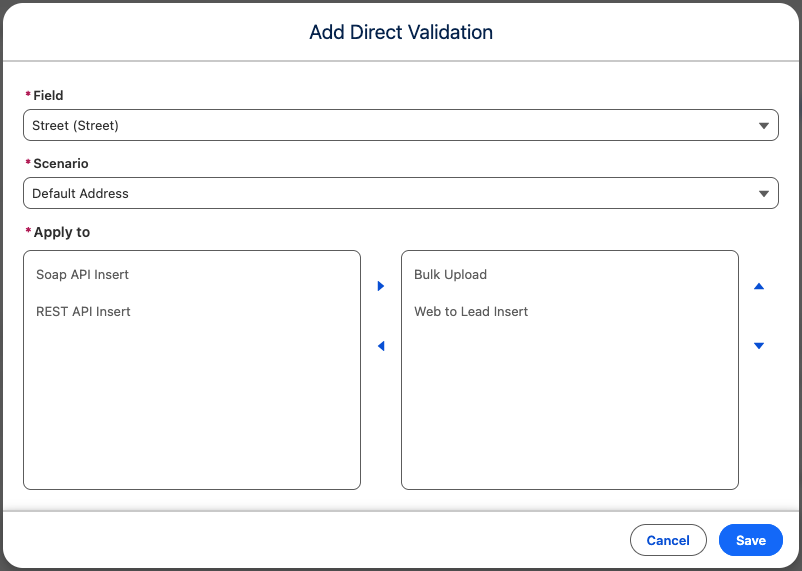
- At Field, select the field you want to validate upon insert. Fields that have a validation configured in Object Configuration can be selected here.
- At Scenario, select the Auto Process scenario you want to use to validate the field automatically. The Auto Process scenario decides what needs to happen in case of invalid input.
- At Apply to, Move the channels to which you want to apply the Direct Validation to the right hand side. Choose from Soap API, REST API, Bulk Upload, and Web to Lead Insert.
Different Salesforce features might be using different channels; for example Salesforce Inspector uses the Rest API.
| Soap API | Records inserted via the Salesforce Soap API. |
| Rest API | Records inserted via the Salesforce Rest API. |
| Bulk Upload | Records inserted in a bulk operation, for example via the Salesforce Bulk Upload (Data Import Wizard, Dataloader.io) or Plauti's Data Import Flow (available for Plauti Cloud, Desktop and Server). |
| Web to Lead | Records inserted via Salesforce Web-to-Lead. |
Click Save. The Direct Validation will appear in the list.
You can edit it via the Configure option, or delete it via the action menu at the end of the row.
Using Direct Validate
After importing records via any of the above methods, the fields configured with Direct Validate will be processed using Plauti Verify Auto Processing.
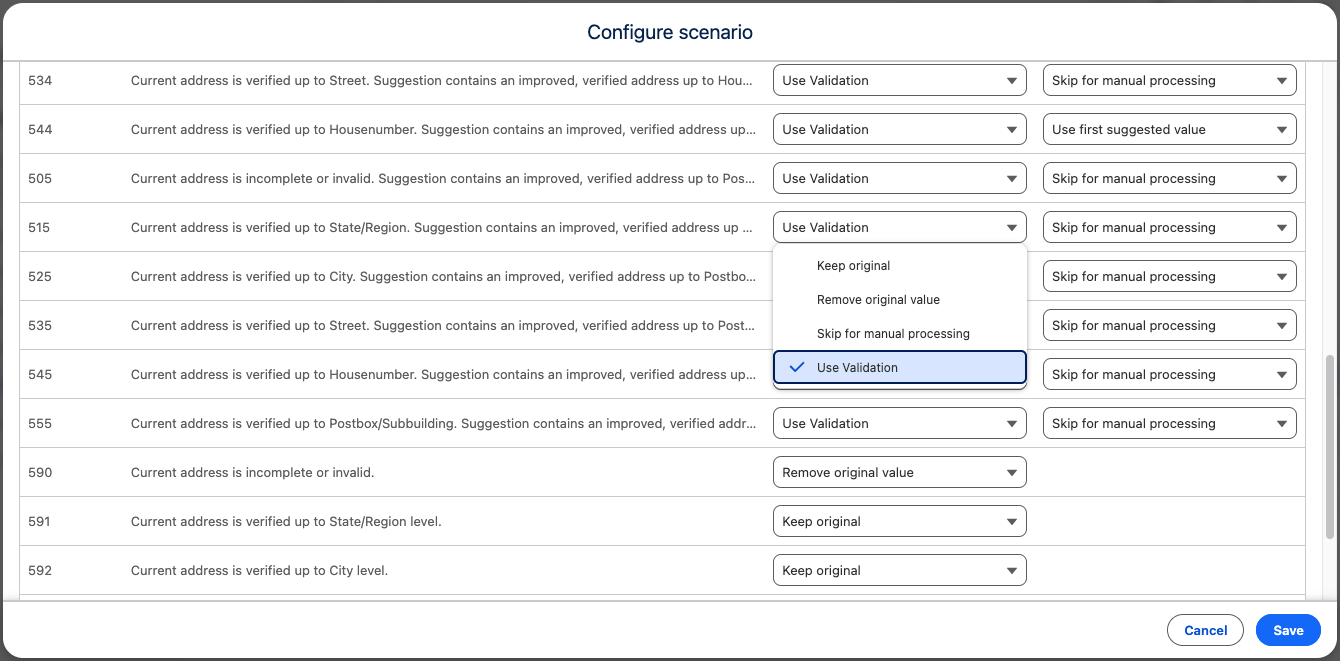
With Auto Processing, Plauti Verify validates the value and returns a status code that gives information about the validation. For every status code that Plauti Verify can return, you can set an action in the Auto Processing scenario for how the value and its validation should be processed.
Auto Processing actions
| Use Validation | Accept Plauti Verify's suggestion for improvement. The status dot will turn green. |
| Keep original | Keep original value. The color of the status dot will not be altered. |
| Remove original value | Remove original value. The field will be cleared. |
| Skip for manual processing | A Verify job will be created. The color of the status dot will not be altered. |
| Use first suggested value In case of multiple suggestions when validating an address |
Plauti Verify picks the first value from the list of suggestions. The status dot will turn green. |
Skip for manual processing
You can find records that are skipped for manual processing on the Verify Job page, in a dedicated 'Verify Direct Validate' job. Here you can manually pick the preferred suggestion. A new job is generated each day that records are skipped for manual processing.

Tip: Add Verify Live to the record page layout. This component shows the current validation status of the fields configured with Plauti Verify for the record you are currently viewing. If a field is not validated yet, you can do so right there on the record in the Verify Live component.